edible adventures from the centre of the universe

28 April 2008

Cookbook Challenge #6: Yet Another delicious. Lasagna

Hello! I'm still alive! I know I've been a negligent blogger -- I've been preoccupied with choosing a caterer for the wedding, and this distraction has been compounded by the Tivo that Dave got me for my birthday. The altars of new-school Degrassi and Melrose Place have been attracting my worship more than the computer these days. The good news is that a caterer has been chosen and Melrose is in repeats-of-repeats. As such, I'll be brushing the cobwebs off of this here food blog in short order.

I've written about my fave food publication delicious. before, as well as one of my all-time favourite lasagna recipes that came from an issue of this Aussie mag -- it's one of my go-to sources for fresh and inventive recipes. However, the cookbook that I received with my latest subscription has been sitting on my shelf for months. 5 of the best by Valli Little contains recipes from delicious. magazine, sorted by themes of 5 dishes each (such as "5 of the best baked pastas" or "5 of the best savoury tarts") and rounded out with beautiful photography. Since I had such great success with the other delicious. butternut lasagna, the below iteration with rosemary, spinach, and goat cheese seemed like it would be a worthwhile effort. I wasn't wrong -- the tanginess of the chevre complimented the sweet squash and savourly rosemary perfectly. I was also super-impressed with how flavourful this lasagna was with a minimum amount of cheese -- I'm all for guilt-free indulgences, and this dish fits the bill. Give it a try!

Butternut & Goat Cheese Lasagna

1 kg butternut squash, peeled and chopped
4 tbsp olive oil
2 sprigs fresh rosemary, minced (leaves only)
2 tbsp unsalted butter
2 leeks, washed and thinly sliced
300g baby spinach leaves
2 garlic cloves, crushed
400ml good quality tomato passata (sieved tomatoes)
fresh lasagna sheets
150g soft goat cheese, crumbled
1/2 cup freshly grated parmesan

1. Preheat the oven to 400 degrees. Toss the butternut with 2 tbsp olive oil, half the rosemary, and salt & pepper. Roast in the oven for 30 minutes, until tender. Transfer to a bowl, mash, and set aside.
2. Heat the remaining oil and butter in a medium pan over low heat. Add the leeks and cook for 5 minutes, until softened. Add the spinach and garlic, and cook for another couple of minutes until the spinach is wilted. Remove from heat and set aside.
3. Grease a 23cm X 15cm dish. Spoon 1/4 cup of the tomato passata into the bottom of the dish, season with salt & pepper, and spread evenly. Place a sheet of lasagna on top of the passata, and spread with the mashed butternut. Add another layer of lasagna, then another 1/4 cup of passata, and then the leek-spinach mixture.Finally, add another layer of lasagna and spread it with the remaining passata.
4. In a small bowl, toss together the goat cheese, parmesan, and remaining rosemary. Sprinkle this mixture over the top of the lasagna. Cover the dish in foil, and bake for 30 minutes. Then, remove the foil and return to the oven for another 15 minutes, until the cheese begins to brown. Let sit 5 minutes before serving.

serves 6

Labels: ,

09 March 2008

Cookbook Challenge #5: Salmony!

Late last year, I was browsing through the BMV on Bloor and happened upon a copy of Salmon by Diane Morgan for a ridiculously low price. Like tuna, salmon is a fish that I hated to eat as a child, but have warmed up to since I started eating fish again post-vegetarianism. However, I still find it fairly intimidating to cook. Since Salmon is filled with mouth-watering photos and fairly simple instructions, it seemed like the perfect tool to help break me of my fear of this delicious fish.

I finally got around to using this cookbook once we returned from our Christmas vacation, and the honey-soy broiled salmon looked like the perfect thing to warm us up on a cold winter night. This recipe was very easy to make, and the only hiccup I encountered was when our super-sensitive smoke alarm wouldn't stop going off during the cooking process. Served on top of a simple sweet potato mash and some wilted spinach, the end result was a piece of perfectly-cooked fish that was both sweet and salty, with a tiny kick of wasabi heat. It was super-tasty, and I can't wait to make another recipe from this book. Salmon, you're not so tough after all.

Honey-Soy Broiled Salmon

2 salmon filets (6oz each)
1 tbsp soy sauce
2 tbsp rice vinegar
1/4 cup mirin
1/2 tsp finely grated fresh ginger

Sauce

2 tsp wasabi powder
1 tbsp fresh lime juice
2 tbsp soy sauce
1/4 cup honey

1. In a small bowl, combine the soy sauce, rice vinegar, mirin, and ginger. Pour over salmon (in a small baking dish or a large zip-top bag), and marinate for 30 minutes to 1 hour.
2. Just before cooking the fish, make the sauce: In a small saucepan, combine the lime juice, wasabi, soy sauce, and honey. Warm over medium heat until the sauce comes to a boil, stirring constantly. Turn the heat to low and simmer sauce until it thickens and becomes syrupey, about 2 minutes. Set aside and keep warm.
3. Arrange an oven rack about 4 inches from the heat source and pre-heat the broiler. Remove the salmon from the marinade, and wipe off extra liquid. Place the salmon on a baking sheet, skin side down if you are using filets with skin, and broil until it begins to colour, about 3 minutes. Turn the salmon and cook for about 3 minutes longer, until almost opaque throughout.
4. If applicable, remove the skin from your salmon and serve immediately. You can serve this with steamed rice, but I put it on top of some sweet potato mash and wilted spinach.

serves 2

Labels: ,

04 December 2007

Cookbook Challenge #3: Very Nice!

Soft, fresh bread is probably my biggest food weakness. I love it as part of a sandwich; I love it plain, topped with creamy butter; I just love it. As such, I was psyched when I first came across the original ACE Bakery Cookbook a few years ago -- so many great recipe ideas using yummy, yummy bread! Beacuse of this book, one of my more exciting realizations when I moved to Toronto was that I could finally buy fresh ACE bread from my local grocery. Yay!

Last Christmas, my mom gave me the second ACE cookbook: More from ACE Bakery. This sequel is pretty similar to the original, with lots of mouth-watering photography and amazing-sounding recipes. Even so, I just never got around to using it. Until now.

Flipping through its pages the other day, one photo really jumped out at me: creamy-looking egg-salad piled high on fresh multigrain bread with fresh tomato slices and lettuce, topped with three beautiful asparugus spears. It looked So. Good. I decided to make the "Really, Really Nice Egg Sandwich" myself, and found the most difficult part to be finding plain 2% yogurt at the grocery store (note: this wasn't very hard). I'm happy to say that this sandwich tasted as good as it looked -- the eggs were perfectly creamy and tangy, and paired nicely with the fresh veggies. I used the best-quality unsliced multigrain bread I could find, and its pillowy soft interior went great with the smooth eggs, while its nutty, crisp crust made things interesting. I served these sandwiches with some extra steamed asparagus and a nice, garlicky aioli. It made for an extremely satisfying light meal. Enjoy!

Really, Really Nice Egg Sandwich
3 eggs, hard boiled and peeled
6 asparagus stalks
3 tbsp 2% or 4% yogurt
heaping 1/4 tsp Dijon
generous 1/4 tsp freshly squeezed lemon juice
heaping 1/4 tsp kosher salt
2tsp fresh chives, minced
2 to 4 leaves boston lettuce
2 thick slices flax or multigrain bread
1 large tomato, sliced
freshly ground black pepper and salt, to taste

1. Steam the asparagus until cooked through, but still crisp. Shock with cold wate, drain, and set aside.
2. In a medium bowl, combine the Dijon, yogurt, chives, lemon juice, and kosher salt. Grate the hard boiled eggs into the yogurt dressing (use the large holes in your grater) and gently toss. Salt and pepper to taste.
3. Place the lettuce on the bread slices and top with tomato slices. Pile on the egg salad and arrange the asparagus on top. Finish with a generous grind of fresh pepper and serve open-faced.

serves 2

Labels: ,

31 October 2007

Cookbook Challenge #2: Creepy Edition

BOO! With the scariest season of the year upon us, it was a no-brainer for me to make It Came from the Kitchen by Geoff Isaac and Gordon Reid my second virgin cookbook challenge. Acquired at the 2007 Festival of Fear, this cute little tome boasts "Monstrously delicious celebrity recipes from Dracula, Frankenstein, the Wolf Man, assorted aliens, and beyond!" From deviled eggs (natch) and "Vampire Broth" to Salmon en Croute and Risotto Con Piselli E La Lattuga (a favourite of Vincent Price), the recipes included in It Came from the Kitchen span the world, outerspace, life, and the afterlife. Peppered with anecdotes and trivia about some of the biggest names to ever make you pee your pants, the authors' passion for film and food is obvious, making this cookbook a delight to use.

Choosing my first recipe from It Came from the Kitchen was difficult, but I landed on a shrimp dish attributed to Paul Naschy, the "Spanish equivalent to Lon Chaney and Bela Lugosi." It stood out to me because of its simplicity, Spanish-ness, and heavy inclusion of beer. Beer makes everything better, no? Exceedingly simple to make, Shrimp and Beer with Tomatoes features clean, bright flavours and a mess of tasty broth to soak up with fresh crusty bread (I recommend a nice olive loaf). The recipe claims to serve two, but that would only be possible if it were a romantic dinner for Godzilla and Mothra -- Paul Naschy must have an unreal appetite. This recipe can easily serve three, maybe four.

Happy Halloween, y'all!

Paul Naschy's Shrimp and Beer with Tomatoes

1.5 lbs shrimp, peeled and deveined
1/2 cup spanish onion, diced
1 tbsp garlic, minced
2 tbsp olive oil
3 tomatoes, seeded and chopped
1 tbsp flat-leaf parsley, minced
1 bottle beer
2 tbsp tomato paste
a few dashes hot sauce

1. Warm the oil in a large pot over medium-low heat. Add the onions and garlic, and cook slowly until soft. Add the shrimp and beer, and boil until the shrimp just begins to change colour to pink.
2. Add the tomatoes, hot sauce, and tomato paste and stir to combine. Simmer until shrimp is fully cooked, and remove from heat. Stir in parsley and season with salt and pepper. Serve immediately with fresh crusty bread for dipping.

Serves 3

Labels: ,

14 October 2007

Cookbook Challenge #1

I love collecting cookbooks. When I get a new one, I always sit down and read it from cover to cover, like a novel. Because of this obsession, I've amassed quite a few cookbooks over the years. However, a recent inventory showed me that there are 13 of them that I have never cooked from. For shame!

In an effort to correct this, I've included a challenge in my 101 in 1001 list to make something out of every cookbook I own. One of the ones that had been previously overlooked is Eat, Shrink, and Be Merry by Janet and Greta Podleski, which Dave's mom gave to me a while ago and I just never got around to using. I generally shy away from "low fat" cookbooks, because my past experience with them has often led to boring, flavourless dinners. I hoped this foray into Dietland would end in tastier results.

As I leafed through Eat, Shrink, and Be Merry, a recipe for Tofu Parmesan jumped out at me (called "Parma Chameleon" -- the sisters Podleski like to use twee, punny names for recipes in their cookbooks. Some find this cute, but it makes me cringe.). I like tofu. And cheese. And tomato sauce. It was an easy decision.

This recipe was very easy to throw together, and I served it over some lightly-seasoned spaghetti squash instead of pasta (if you're going healthy, you might as well go all the way). The results were fantastic -- crispy tofu cutlets with flavourful browned mozza and spicy tomato sauce. I would make this again in a second.

One down, twelve to go!

*Note: The recipe in the cookbook makes way too much breadcrumb mixture, so I've corrected the proportions below.

Tofu Parmesan

1lb firm tofu
1/2 cup whole wheat bread crumbs
1/4 cup parmesan (fresh grated, ideally)
1/2 tsp each dried basil and dried oregano
a pinch red chile flakes
1/4 tsp each salt and freshly-ground pepper
1 egg
1.5 cups of your favourite tomato sauce (I used Classico Spicy Red Pepper)
6 slices mozarella
1 tbsp fresh parsley, minced

1. Preheat oven to 400 degrees and grease a baking sheet
2. Drain tofu and blot dry with paper towel. Slice block into 8 even slices (about 1/2 inch thick), and blot slices dry again with paper towel.
3. Combine bread crumbs, 2 tbsp parmesan, basil, oregano, chile flakes, salt, and pepper in a shallow bowl. Place egg in another shallow bowl and beat lightly.
4. Working with one piece at a time, dip tofu in egg to coat, and then in crumb mixture. The slices should be well-covered with crumbs. Place coated tofu on baking sheet, and bake for 20 minutes, turning once halfway through the cooking time. Remove tofu from oven.
5. Grease an 8x8 baking dish, and pour 1/2 of your tomato sauce in the base. Place browned tofu in a single layer on the tomato sauce and top with remaining sauce and parsley. Cover tofu with sliced mozarella and remaining parmesan. Bake, uncovered, for 15 minutes and then finish the dish under the broiler to brown the cheese. Let stand 5 minutes before serving.

Serves 4

Spaghetti Squash

Pierce squash all over with a knife. Place entire squash in the microwave, and cook on high for 12 minutes. Once cooked, allow squash to cool slightly before cutting in half and removing seeds with a spoon. Use a fork to "shred" the flesh of the squash, and transfer it to a bowl. Toss with 1 tbsp butter and season with salt and freshly-ground pepper to taste.

Labels: ,

29 September 2007

Chow-dah!

As summer transitions to autumn, what could be more appropriate than a warm, comforting bowl of soup that features cheerful, sunny flavours? I found this recipe in my most-used cookbook, Rebar by Audrey Alsterberg and Wanda Urbanowicz -- I love the summery combination of fresh, juicy tomatoes with sweet corn and fragrant basil. A touch of cream brings a richness that's perfect for a blustery autumn day, and this chowder has a nice heat to it from the jalapenos (which I harvested from my very own container garden, thankyouverymuch), which also helps to keep summer alive just a little bit longer.

End-of-Summer Chowder

4 cups vegetable stock, warm
1 tbsp butter
1/2 yellow onion, diced
1 tsp salt
3 garlic cloves, minced
1/2 tsp cracked pepper
1/2 tsp dried oregano
1/4 cup fresh basil, chopped
2 cups diced baby potatoes
2 jalapeno peppers, sedded and minced
1 red pepper, diced
2 cups corn, fresh or frozen
1/2 cup whipping cream
1 ripe tomato, seeded and diced
2 tbsp cilantro, chopped

1. Heat butter in a stock pot and sautee onion with 1/2 tsp salt, until soft. Add garlic, cracked pepper, oregano, and half of the basil. Sautee for five minutes, then stir in the potatoes, jalapenos, red pepper, corn, and remaining salt. Sautee briefly, then add stock. Cover, and bring the soup to a boil. Reduce heat and simmer for 10 to 15 minutes, until potatoes are tender.
2. Stir in cream and return the chowder to a simmer. Add tomatoes, remaining basil, and cilantro. Heat through and serve immediately. Yum!

Serves 4

Labels:

23 September 2007

My New Favourite Lasagna

When it comes to lasagna, I'm easy to please -- my love for this classic dish is nearly Garfield-esque. However, I've never really come upon a lasagna that truly blew my mind. I'm glad to say that streak has ended.

An issue of delicious. recently arrived in my mailbox with a particularly enticing photo on the cover of a butternut lasagna with sage butter. My interest piqued, I headed directly to the market to pick up supplies. This lasagna was surprisingly easy to throw together. As it baked, it filled my condo with the delicious aromas of roasted squash, nutmeg, and sage, and it came out of the oven golden brown and puffed up like a souffle.

Topped with a splash of rich and nutty browned sage butter, I fell in love with this lasagna at first bite. The creamy ricotta and smooth butternut puree make for an ethereal mouthfeel, and the warm Autumn-y flavours could not be more comforting. This is absolutely the best lasagna recipe I've ever tried, and I hope you enjoy it as much as I do.

Butternut, Sage, & Ricotta Lasagna

800g Butternut squash, peeled and cut into 2cm pieces (I buy the pre-cut squash from the grocery store)
2 tbsp olive oil
1/2 tsp dried chile flakes
1 tbsp chopped sage, plus 12 whole leaves to serve
1/4 tsp freshly grated nutmeg
350g ricotta
1 egg
1 cup freshly grated parmesan, plus extra to serve
8 fresh lasagna sheets, cooked in boiling water until not quite al dente
100g unsalted butter
2 tbsp chopped walnuts (optional)

1. Preheat oven to 375 degrees.
2. Place butternut on a baking tray. Drizzle with oil, and season with chile flakes, salt, and freshly ground pepper. Cover with foil and bake for 25 minutes, until the butternut is tender. Allow to cool slightly.
Puree butternut in a food processor with the chopped sage and nutmeg. Set aside.
3. Clean/wipe out processor and then process the ricotta, egg, parmesan, and salt & pepper. Sometimes I add a pinch of allspice to the ricotta.
4. Lightly grease an 8x8 inch baking pan. Cover the base of the pan with lasagna sheets, and spread with 1/2 of the butternut mixture. Add another layer of lasagna sheets, and then spread with 1/2 of the ricotta. Repeat process, then sprinkle final layer of ricotta with extra parmesan.
5. Cover with foil, and bake for 35 minutes. Uncover and bake for another 15 minutes or until golden and puffy. Stand for 5 minutes before serving.
6. Meanwhile, heat the butter, walnuts (optional), and whole sage leaves in a saucepan over medium heat until the butter begins to turn golden (stir constantly). Remove from heat, and serve lasagne topped with a little bit of the sage butter and some extra parmesan.

Labels:

29 August 2007

Barbeque Linguini

With only a few weeks of Summer left, I've been feeling obligated to fire up the barbeque as often as possible. As such, I was happy to come across the following recipe in my copy of A Year in a Vegetarian Kitchen by Jack Bishop. I find this cookbook to be great for simple, yet elegant dishes such as this Linguine with Grilled Fennel and Sun-Dried Tomatoes. A breeze to throw together, this pasta is dressed lightly with the subtly sweet anise flavour of fennel, smoky from the grill, and intensely tomato-ey sun-dried tomatoes. A splash of vinegar and a handful of high-quality cheese bring everything together in perfect harmony. Dave and I gobbled it up with some extra garlicky garlic bread, which definitely helped us better enjoy our last days of Summer.

Linguine with Grilled Fennel and Sun-Dried Tomatoes

1 large fennel bulb, stalks and fronds discarded, cut into 1/2 inch slices through the base
2 tbsp extra-virgin olive oil
salt & pepper
5 sun-dried tomatoes packed in oil, drained and sliced into thin strips
2 tbsp fresh basil leaves, minced
1/2 tbsp balsamic vinegar (eyeball it)
1/2 lb linguine
freshly grated parmigiano-reggiano

1. Light your grill, and set to medium-high. Brush fennel with 1 tbsp of the oil, and season with salt and pepper. Place the fennel on the grill, and cook until tender with nice dark char marks, turning once.

2. Briefly cool the fennel, and cut into thin strips. Combine the fennel, tomatoes, basil, vinegar, and 1 tbsp of the oil in a large bowl. Salt and pepper to taste. Cover and set aside for up to one hour.

3. Cook pasta until al dente in well-salted boiling water. Reserve 1/4 cup of the cooking water and drain the pasta. Toss the pasta with the fennel sauce, and moisten with the reserved cooking water as needed. Serve immediately, topped with a generous amount of parmigiano-reggiano.

Serves 2

Labels:

23 August 2007

The Taste of Tuna-Love is Sweet

Thanks to a link from Elise's delicious-sounding Tarragon Tuna Melt post over at Simply Recipes, I have a bunch of new visitors today. Welcome!

Elise wasn't the only one who had some fun with tuna melts this week. We've been battling some chilly weather here in Toronto, so I was craving tropical flavours -- if I can't have summer outside, at least I can have it on my plate. Because sweet and spicy is pretty much the best combo ever, I decided to pimp my tuna with bold jalapeno and cheery fresh pineapple. To build on the "island" theme, I added some of my favourite curry powder and smoky, rich ancho. Savoury red onion and cilantro rounded everything out, while gooey spicy cheese finished each bite with an extra layer of heat. I took a picture, but it really didn't do these bad boys justice. Give them a try -- like Dave and I, I bet you'll fall for them like a child.

(BA BADA BADA BA DA BA)

Ring of Fire Tuna Melts

1 can tuna, drained
2 tbsp red onion, finely chopped
1/2 jalapeno, finely chopped
1/4 cup pineapple, diced
2 tbsp cilantro, finely sliced
1 tbsp good quality curry powder
1 tsp ancho powder
2 tbsp light mayonnaise
2 english muffins
4 slices spicy monterey jack cheese

1. Mix tuna, onion, jalapeno, pineapple, cilantro, curry powder, ancho powder, and mayonnaise in a bowl until well combined.
2. Open the english muffins and broil until lightly browned. Remove from broiler, and scoop 1/4 of the tuna mixture onto each muffin half. Finish with a slice of monterey jack.
3. Put the muffins back under the broiler until the cheese melts and starts to brown. Dig in!

Serves 2

Labels:

21 August 2007

Cowgirl Pasta Salad

On our way back from Tobermory, Dave and I stopped at a corn farm to pick up some sweet cobs, fresh from the field. To use the last of it up, I had some fun inventing this pasta salad that combines a bunch of my favourite Tex-Mex flavours. It's hard to beat plain old roasted corn and asparagus, but the sweet-smoky charm of these veggies really shines when paired with a spicy, tangy guacamole dressing. Thrown together on a whim, I think this summery recipe is going to become part of my regular repertoire. Giddyup!

Cowgirl Pasta Salad
350g chunky pasta (I used "scoobi-doo")
1 cob of corn
1 bunch of asparagus, woody ends removed
1/2 red pepper, diced
2 tbsp fresh chives, minced
2 tsp olive oil
1 tsp ancho chile powder (optional)
diced tomato for garnish
salt & pepper

Guacamole Dressing
1 ripe avocado
1 fresh jalapeno
juice from 1/2 lime
1/3 cup light mayo
1/4 cup light sour cream
1 clove garlic, diced
salt, to taste

1. Boil pasta in salted water until al dente. Rinse under cold water and put into a large mixing bowl with red pepper and chives.
2. Make the dressing by combining all ingredients in a blender and pureeing until smooth. Add salt to taste, and set aside.
2. Toss asparagus with olive oil, ancho powder (if you have it), and salt and pepper. Grill over medium high heat, until brown and roasty. Chop asparagus into 1-inch pieces and add to mixing bowl with pasta.
3. Roast your cob of corn whatever way you prefer (I usually rub it with a little butter, wrap in tinfoil, and roast over medium high heat until the kernels are lightly browned -- about 15 minutes) -- you can roast the corn and the asparagus at the same time. Use a knife to carefully chop the kernels off the cob, and add the roasted corn to the mixing bowl.
4. Add the dressing to the mixing bowl and toss your salad until well-combined. Season to taste. Serve garnished with diced tomato, a slice of lime, and fresh-ground pepper.

Serves 3

Labels:

24 July 2007

Salmonburger, salmonburger, chips. No Coke, Pepsi!

This month's delicious. was particularly, er, delicious. Isn't that always the way? Just as your magazine subscription is about to expire, a stellar issue shows up in your mailbox like a vile temptress, begging you to resubscribe. Just when I thought I was out...

Anyway, as I flipped through this issue nearly every recipe made me stop and think: "I am so going to make that!" I've already managed to throw together two of said recipes: the above-pictured salmon burger and a deeply moving butternut lasagna, about which I will post in the near future. But not today. Today I am all about the fish.

Despite what a lot of recipes on the Internet would have you believe, perfect salmon burgers should be simply made from fresh salmon and minimal seasoning -- just say no to dry, flavourless breadcrumb filler! Topped with some classic guacamole, each mouthful showcases the clean flavour of the fish alongside buttery avocado. A subtle glow of jalapeno warmth finishes each bite off nicely. Perfectly sided with fresh corn-on-the-cob, these burgers are an ideal summer treat and I can't wait to make them again. An interesting variation on the recipe might be to replace the dill and mustard in the patties with a good dose of quality curry powder -- the flavour combination of earthy, complex curry with creamy, tangy guacamole is out of this world, and I think it would match nicely with the meaty salmon.

Salmon Burgers with Guacamole

300g fresh salmon, skinless, chopped into large pieces
1/2 shallot, finely chopped
2 tsp finely chopped fresh dill
1/2 tsp dijon mustard
1 small egg white
2 tsp olive oil
1 english muffin, split in half

Guacamole
1 ripe avocado, diced into small cubes
1 tbsp lime juice
1 garlic clove, minced
1/2 jalapeno, minced
1 tbsp cilantro, chopped

1. Place salmon, shallot, dill, mustard, egg white, salt, and freshly ground black pepper in the bowl of a food processor. Pulse very briefly, until the fish is roughly chopped and the ingredients are mixed, but not pureed. Divide the mixture into 2, and form into large patties. Place on a tray or plate and refrigerate for 30 minutes to set.
2. Mix all guacamole ingredients together in a bowl, and then salt to taste. Cover and set aside.
3. Heat the olive oil in a skillet over medium heat. When the oil is quite hot, sear the burgers for 2 minutes or so on each side (turning carefully). Remove from heat when they are cooked to your liking.
4. Lightly toast the english muffin halves. Top each with a salmon patty and half of the guacamole. Dig in!

Serves 2

Labels:

05 July 2007

Cupcake Heaven

To celebrate Dave's birthday this month, I thought it would be nice to bake him some cupcakes. He was craving carrot cupcakes and, after a long Intarweb search, I came across an old Cook's Illustrated carrot cake recipe that looked just about perfect -- I made a few minor adjustments to reduce the amount of oil and then I ran with it. Topped with maple cream cheese icing and Skor toffee bits, these treats were moist and carroty with a nice spicey undertone. The icing was a little runny, but I didn't hear any complaints from our pals as they licked it from their fingers and went back for seconds. In Dave's words: "Oh, man."

Carrot Cupcakes with Maple Cream Cheese Icing

2.5 cups unbleached all-purpose four
1.25 tsp baking powder
1 tsp baking soda
1.5 tsp ground cinnamon
1/4 tsp nutmeg (fresh ground/grated is best)
1/8 tsp ground cloves
1/2 tsp salt
1 lb. medium carrots, peeled and grated
1.5 cups granulated sugar
1/2 cup brown sugar, packed
4 large eggs
3/4 cups vegetable oil
3/4 cups unsweetened applesauce

Icing

1 pkg (250g) cream cheese, room temperature
1/4 cup unsalted butter, room temperature
2.5 cups powdered sugar
1/4 cup pure maple syrup
1 pkg Chipits Skor tidbits, for garnish

1. Preheat oven to 350 degrees. Line muffin tins with cupcake papers.
2. Mix together flour, baking powder, baking soda, cinnamon, nutmeg, cloves, and salt. Set aside.
3. In a food processor, process granulated and brown sugars with the eggs until frothy, about 20 seconds. Add applesauce and mix for an additional 5 seconds. With the machine running, add oil through the feedtube in a steady stream, and process until mixture is light in colour and well-emulsified. Scrape mixture into a large bowl, and stir in the carrots. Add the dry ingredients, and combine until no streaks of flour remain (do not overmix).
4. Fill cupcake liners 3/4 of the way full, and bake for about 20 minutes (until a toothpick comes out clean). Let cupcakes cool completely before frosting.
5. Make icing: using an electric mixer, combine cream cheese and butter in a mixing bowl until light and fluffy. Add powdered sugar and beat at low speed until blended. Beat in maple syrup and chill until icing firms slightly. If icing is still too runny, add more powdered sugar as necessary.
6. Frost the cupcakes and top with Skor bits. Finally, scarf.

makes about 16 cupcakes

Labels:

17 June 2007

Yummy Pizza Topping Alert!

It's KALE! I was happy to be able to combine two of my current obsessions the other day (homemade pizza and my container garden) when I added some freshly-harvested kale to a homemade veggie sausage (Tofurky Italian Sausage) and onion pizza. It was amazing! All I did was saute the kale briefly with some garlic in a little olive oil before adding it to the pizza, and the greens added a delicious depth of flavour to the otherwise standard sausage pie. I think I might experiment with a swiss chard pizza next. Yum!

Labels: ,

30 April 2007

Pizza Porn

Before entering the oven:

After the heat:
I'm happy to say that this pizza tasted as good as it looks. Probably even better. A couple of days ago, I was in the mood to try out a new topping combo, so my friend Leah and I whipped up (read: put elbow grease into the labour-intensive process of making) the "Americana" pizza dough from Peter Reinhart's American Pie. If you are at all interested in making amazing pizza at home, invest in this book, a pizza stone, and a pizza peel. You won't regret it.

After the dough had sat for the requisite 24-hours in the fridge, I stretched it into something resembling a circle and layered on fresh pesto, pre-grilled zucchini and asparagus, and goat cheese. After 8 minutes in a 500 degree oven, I was in pizza heaven. Letting the dough rise in the fridge (per Reinhart's instructions) yields a crisp crust with complex flavours -- no floury, gummy, tasteless mouthfuls here. Further, the garlicky fresh flavour of the pesto melded perfectly with the charred, slightly nutty asparagus and zucchini. Not to mention the tangy, melty, goat cheese on top ... I love it when a simple combination of ingredients produces such a stellar meal. I think I have a new favourite pizza!

Labels:

20 April 2007

Itadakimasu!

If "Countries where people eat curry" were a Family Feud question, I'm guessing the top responses would be ("Survey said!") India, Britain, and maybe Thailand. Not many would guess that curry is one of the most popular dishes in Japan, where most people eat it at least once per week.

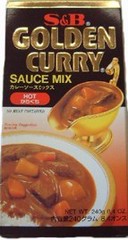
Introduced by the Brits in the late 19th century, curry in Japan is typically made with meat, potatoes, carrots, and onions, and served with sticky short-grain rice (the dish is called "curry rice"). It's also thicker, sweeter, and milder than its Indian counterpart. Best of all, it's ridiculously easy to make using prepared Japanese curry "roux," which can be found in any Asian supermarket -- S&B Golden Curry is the most popular brand in North America.

In need of a quick and easy, but also warming and delicious dinner last week, I picked up some "Hot" Golden Curry mix (the "hot" is really not that hot, but you can also get mild or medium), veggies, and fried tofu puffs at my local Asian grocery and got to work. The secret to a great Japanese curry, I find, is lots of onion, slowly cooked until golden, and a couple cloves of garlic. This really deepens the flavour of the sauce. I've also heard that adding a grated apple works well, but I haven't yet tried that tack. This recipe is a great one to experiment with because it's really hard to go wrong -- throw in your favourite ingredients and come up with your own perfect curry rice! Here's mine:

Tofu Curry Rice

2 medium Yukon Gold potatoes, cut into bite-sized cubes
1 large yellow cooking onion, diced
2 cloves garlic, minced
1 tbsp olive oil
1/2 tsp salt
2 carrots, peeled and cut into 1/4 inch slices on the diagonal
2 celery stalks, cut into 1/4 inch slices on the diagonal
2 cups fried tofu puffs
3 squares S&B "Hot" Golden Curry roux
2 and 1/4 cup water

1. Heat olive oil in a deep frying pan or pot. Add onion and salt and saute over medium-low heat until translucent and lightly golden, about 5 minutes. Add potatoes, carrots, and celery, and saute for an additional 5 minutes. Add garlic and cook until fragrant, about 2 minutes.
2. Add water, roux, and tofu to the pan. Bring to a simmer and stir until roux dissolves. Cover and let stew simmer over low heat until potatoes are tender, about 10-15 minutes. Add a little more water if your sauce is too thick. Season with salt and fresh ground pepper to taste.
3. Serve curry next to sticky short-grain rice. Grab a spoon and dig in!

serves 3-4

Labels:

17 April 2007

Waiting for the Sun

So, it's mid-April and still FREEZING, dreary, and all-around blah in Toronto. Wiarton Willie is a damn liar. I demand sunshine!

Until I can stop wearing my mittens to drive to work, I'm still hooked on hot, winter-y dishes to keep myself unfrozen. Last night, I made a white bean and kale soup that really hit the spot -- kale is one of my favourite greens because it has such an interesting texture, and it tastes great with tomatoes and creamy canellini beans. With a kick of rosemary and red chiles, and feta on top, this soup was the perfect thing to pick me up from yet another wet, cloudy, cold day in Ontario. As an added bonus, Dave, who generally despises beans, had two servings! So you bean-haters out there should give this one a try.

Word on the street (read: Weather Network) is that things are supposed to warm up this weekend. I won't keep my fingers crossed. In the meantime, comfort food is where it's at.

White Bean and Kale Soup

19 oz can canellini beans, drained and rinsed
2 cups veggie stock
1 bay leaf
1 tsp salt
1 tbsp minced fresh rosemary
1 tbsp olive oil
1 small yellow onion, minced
4 garlic cloves, minced
28 oz can diced tomatoes, with juice
generous pinch red chile flakes
1/4 tsp each dry oregano and basil
1 tbsp balsamic vinegar
1 small bunch kale, rinced and sliced
1/4 cup Italian parsley, chopped
lots of fresh black pepper
crumbled feta, for garnish

1. Heat olive oil in a large soup pot. Add the onion, and cook until golden. Add the garlic, red chile, basil, oregano, salt, and rosemary, and cook for another couple minutes (until fragrant). Add the beans, stock, and tomatoes, and simmer over low heat for 20 to 30 minutes.
2. Stir in the kale, vinegar, parsley, and ground pepper to taste. Cook until the kale is wilted, then ladle the soup into bowls and top with feta and some additional fresh parsley. Serve with lots of garlic bread and extra pepper.

serves 3-4

Labels:

02 April 2007

Tuna Noodle!

Tolkien once said that "cellar door" is a beautiful phrase. I'm no linguistics expert, but "cellar door" feels drab to me. Like a grey sky. I much prefer the less famous, but more fun phrase "tuna noodle." I mean, say it out loud: Tuna! Noodle! TunaNoodle! TUNANOODLE! Now that has got to be the best phrase in the English language.

Tuna Noodle Casserole has been a fixture on North American dinner tables since the 50's. It's inexpensive, easy to make, and pure comfort food -- no wonder it's a classic. I like mine extra-creamy, and I mix in some corn to provide a touch of sweetness along with a dash of hot sauce to give it some bite. The result is loyal to the classic retro recipe, but with a little something extra: it's the sassy Jessica to old school tuna casserole's plain Elizabeth Wakefield. Give it a try, and you'll find that "tuna noodle" is as fun to eat as it is to say.

Sweet Valley Tuna Noodle Casserole

2 cups dry macaroni
1 can tuna, drained
1 cup celery, diced
1 cup frozen corn
1/3 cup green onion, chopped
1 tablespoon Italian parsley, minced
1 clove garlic, minced
1 can cream of celery soup
1/2 cup milk
1.5 cups shredded sharp cheddar cheese
1/2 cup mayo (low fat ok)
a few squirts hot sauce (I like Frank's)
salt & pepper

1. Cook macaroni to al dente in salted water and drain. Combine in a large bowl with tuna, celery, corn, green onion, parsley, and garlic.
2. In a small saucepan, whisk together soup, hot sauce, and milk over medium heat. When it begins to bubble, stir in 1 cup of the cheese and cook until the cheese melts completely. Remove from heat and stir in the mayo. Season with salt & pepper to taste.
3. Combine sauce and macaroni mixture, and pour into a greased casserole dish. Sprinkle remaining cheese on top, and bake uncovered at 350 degrees for 35 minutes. Finish under the broiler to brown the cheese, and serve immediately with fresh ground pepper on top!

Serves 4 generously

Labels:

22 March 2007

Itsy-Bitsy, Teeny-Weeny, Yellow Polka-Dot Panini

Hot damn, I love grilled sandwiches! Stringy, gooey cheese and warm, toasty bread -- how can you go wrong? The Italians perfected this treat with the panini, a pressed grilled sandwich usually stuffed with bold, flavourful fillings. Wanting to learn more about this delicious cheese delivery system, I recently picked up Simple Italian Sandwiches by Jennifer Denton, Jason Denton, and Kathryn Kellinger. I'm glad I did -- This cookbook is a lot of fun to read, with a focus on panini, bruschetta, and tramezzini recipes, with a few frittatas and salads thrown in for good measure.

I don't have a panini press, but I have found that my Foreman Grill works just as well. The great thing about paninis is that you don't need to use any oil or butter on the bread -- the heat of the grill toasts it up nicely without any additional fat. So, even though you're gorging on cheese, you can feel pretty good about it.

One recipe from Simple Italian Sandwiches especially appealed to me: an artichoke, fennel, and fontina panini. The tangy marinated artichoke hearts marry beautifully with the subtle anise flavour of the fennel, and the rich fontina cheese mellows everything out. Try this sophisticated grilled-cheese with a balsamic-dressed green salad for a simple, amazing dinner.

Artichoke, Fennel, and Fontina Panini

1 bulb fennel, sliced (tops removed)
3 tbsp olive oil
2 ciabatta rolls
1 cup sliced marinated artichoke hearts
4 ounces Italian Fontina, sliced
salt & pepper

1. Braise the fennel: preheat the oven to 350 degrees. Toss the sliced fennel in a baking dish with the olive oil, and bake for 1 hour, stirring once after 30 minutes. The fennel should be soft and translucent when finished. Cool to room temperature before using.
2. Preheat your panini or Foreman grill. Slice the domed tops off of the ciabata rolls so that the roll is about 1 inch thick. Then, split the rolls horizontally.
3. Spread artichoke hearts over the bottom halves of the ciabatta, and top with 3 tablespoons of the fennel each. Cover the fennel with an even layer of fontina and season with salt and pepper. Place the top halves of the ciabatta rolls over the cheese.
4. Grill the sandwiches for 4 minutes, until the bread is golden brown and the cheese is melted. Let sandwiches sit for one minute before slicing and serving.

serves 2

Labels:

17 February 2007

It is Easy Being Green

After my disappointing experiences with Young Thailand, I had a mean craving for some Thai green curry. Luckily, I have a great Asian market near my work with a large selection of unique veggies and other hard-to-find items. When I stopped in last week, there was an abundance of fresh baby bok choy and snake beans -- two of my favourite Asian vegetables! I grabbed some, along with green curry paste and deep-fried tofu, and headed home to whip up some delicious Thai stew. This dish is very versatile and easy to throw together -- use whatever veggies you like. The end result is sweet and spicy, with a touch of sourness from the lime, and the snake beans squeak when you bite into them! Dave mentioned that the leftovers were even better the next day. Enjoy!

Green Vegetable Curry

2 teaspoons vegetable oil
3 garlic cloves, minced
1 tablespoon grated ginger root
1 can coconut milk
2 tablespoons green curry paste
1-2 teaspoons honey
1/2 cup water
6 baby bok choy, sliced into quarters
1/2 lb snake beans, chopped into 3-inch lengths
10 deep-fried tofu puffs
1 carrot, peeled and thickly sliced on the diagonal
2 green onions, sliced on the diagonal
1/2 cup chopped cilantro leaves
1/2 fresh lime

1. Heat oil over medium in a large, deep skillet or pot. Add garlic and ginger, and cook for one minute, until fragrant. Spoon 1/2 cup of the thickened coconut cream off of the top of the coconut milk can (open it carefully, so the cream stays on top), and add it to the skillet with the green curry paste. Simmer until the coconut cream evaporates and you have a very thick paste, about 2 to 3 minutes.
2. Add the remaining coconut milk, water, carrot, beans, tofu, and honey to the skillet, and salt to taste. Reduce the heat, cover, and cook for about 5 minutes. Add the bok choy, and cook for an additional 10 minutes, until wilted. Remove from heat and stir in the green onions, cilantro, and lime juice. Season to taste, and serve over freshly steamed jasmine rice.

Serves 3

Labels:

29 January 2007

Cowgirl Ranch Eggs

I'm a big fan of eggs. This might be because I grew up in a very egg-friendly household, where my mom would serve up mountains of fried egg sandwiches to my brother and I for dinner on a regular basis. I loved to dip mine in ketchup, so the sweetness of the bright red sauce would mingle with the salty eggs and soft, buttered toast. To this day, I sometimes get mean cravings for this absurdly simple meal.

But, sometimes I like to dress up my eggs. Just this past week, I decided to whip up some huevos rancheros -- a crispy tortilla and creamy beans with perfectly-cooked eggs and spicy ranchero sauce sounded like just the thing to counter my mid-winter blahs. I like to scramble my huevos, but the traditional way to cook them for this dish is sunny-side-up. Try them whatever way you like best, but make sure to grind some fresh pepper over the top before digging in. Caliente!


Huevos Rancheros


1 batch ranchero sauce (below)
2 large corn tortillas
1 tsp vegetable oil
1 cup refried beans
1 tbsp butter
4 large eggs
grated cheddar or monterey jack

1. Preheat oven to 500 F. Brush tortillas with the oil and place on a baking sheet. Bake for 5 minutes or so, until slightly crisp. In the meantime, warm the refried beans (I usually use the microwave).
2. Melt butter in a non-stick skillet. Add the eggs, and scramble until almost set. Sprinkle the eggs with cheese and cover to finish cooking (about 1 minute more).
3. Spread half of the refried beans onto each tortilla. Divide the cooked eggs between the tortillas, and then pile on the ranchero sauce. Grind some fresh pepper on top, and serve with sour cream and diced avocado, if desired.

Ranchero Sauce

1/2 tablespoon butter
1/2 cup chopped onion
1/2 green pepper, diced
1 cup chopped tomatoes, seeded
1/2 cup water
1 clove garlic, minced
1 jalapeno, minced (remove membranes for less heat)
1/2 tsp cumin
1/4 tsp salt
1/8 tsp cayenne
2 tbsp cilantro, chopped

1. Melt butter in a pot over medium heat. Add the onions, green pepper, and a pinch of salt, and cook for about 5 minutes. Add the cumin, remaining salt, cayenne, garlic, and jalapeno, and cook for about 30 seconds, until fragrant. Add the tomatoes and cook, stirring, for 2 minutes. Finally, add the water, reduce the heat, and simmer uncovered until thickened, about 15 minutes. Remove from heat and add the cilantro. Season to taste and cover to keep warm until ready to assemble the huevos rancheros.

Serves 2

Labels: